> ## Documentation Index
> Fetch the complete documentation index at: https://learn.nexudus.com/llms.txt
> Use this file to discover all available pages before exploring further.
# MikroTik
> Use a MikroTik router as a Wi-Fi hotspot with a Nexudus captive portal, so customers sign in with their Nexudus details and are checked in automatically.
## Overview
The **MikroTik** integration turns a MikroTik router into a Wi-Fi hotspot with a captive portal. When customers join your Wi-Fi, they sign in with their Nexudus details. Nexudus lets them online if they hold a valid [pass with network access](/integrations/wifi#who-can-connect), and checks them in and out based on their network activity.
The integration is free.
## Before you start
You need:
* **A MikroTik router running RouterOS with a level 6 licence.** The integration doesn't work with other licence levels.
* **The router's full admin username and password** — the admin user you used to set up the router.
* **Someone familiar with RouterOS.** If your team isn't, a MikroTik consultant can set up the hotspot for you.
## Setting up MikroTik
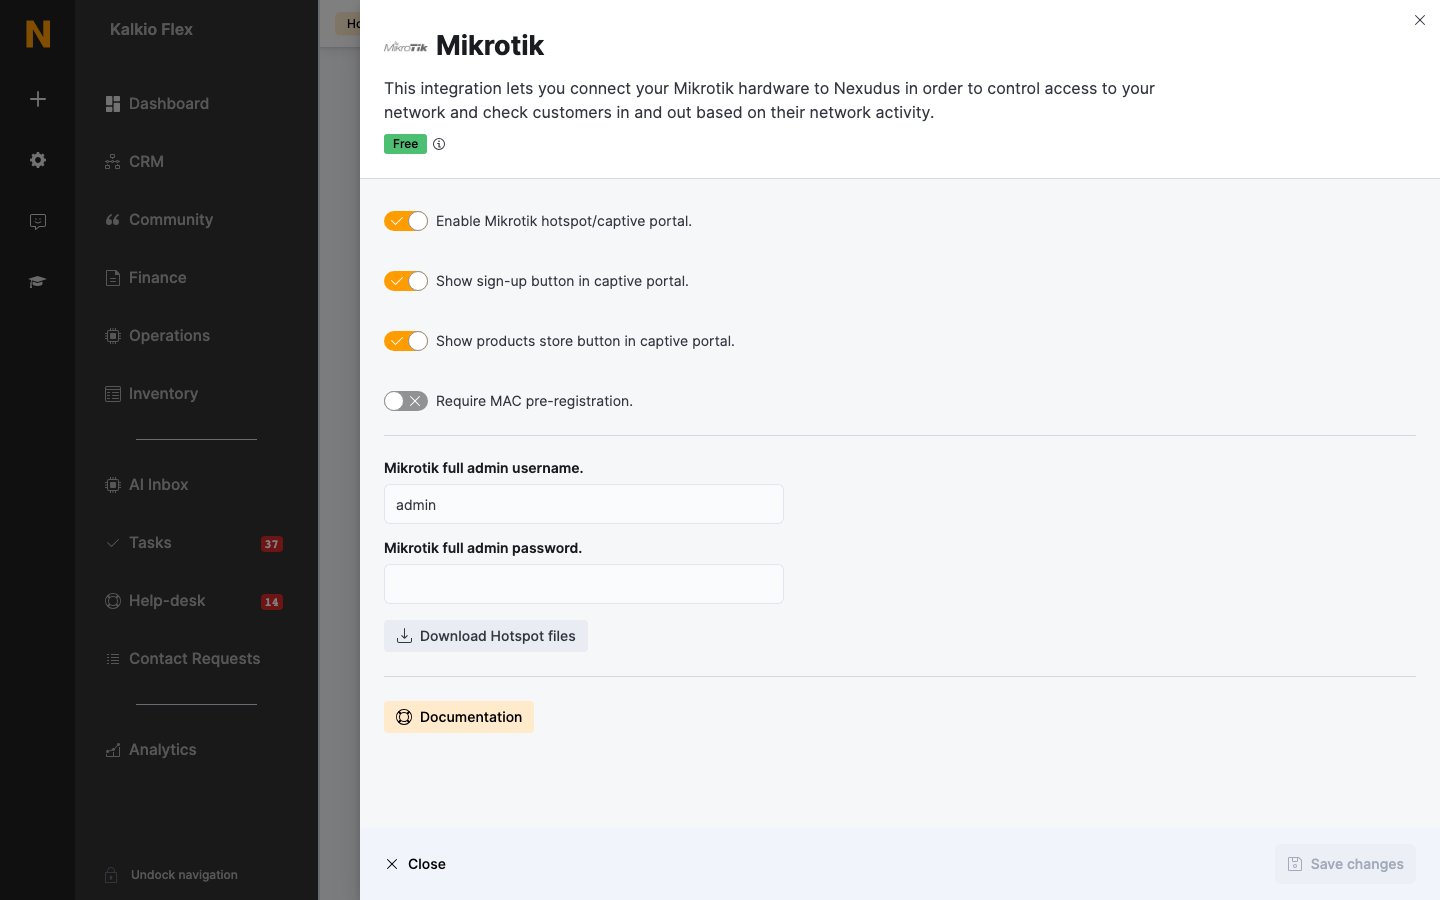
Go to **Settings → Integrations → Mikrotik** and turn on **Enable Mikrotik hotspot/captive portal.** Enter the router's **Mikrotik full admin username.** and **Mikrotik full admin password.**, choose the captive portal options below, and save.
Select **Download Hotspot files**. The download contains the hotspot pages (`login.html`, `logout.html` and `status.html`) and three scripts: `OnLogin`, `OnLogout`, and `CheckActiveUsers`.
In RouterOS, create a hotspot and:
* Set its authentication to **MAC HTTP CHAP**, with **MAC** as the username in **MAC Auth Mode**.
* Use the same admin user you entered in Nexudus as the hotspot's admin user.
* Replace the hotspot's pages with the downloaded `hotspot` files.
* Replace the **OnLogin** and **OnLogout** scripts with the downloaded scripts, and add the `CheckActiveUsers` script.
Add the sites customers must reach before signing in to the hotspot's walled garden — at least your members portal (`.spaces.nexudus.com`, found in **Settings → Website**) and your payment provider, such as `checkout.stripe.com` and `api.stripe.com`, so new customers can sign up and pay.
On each pass that should include Wi-Fi, turn on **Allow customers holding this pass to connect to your IT network.**
 ## Captive portal options
| Setting | What it does |
| - | - |
| **Show sign-up button in captive portal.** | Lets people without an account sign up from the captive portal. |
| **Show products store button in captive portal.** | Lets people buy access — for example a day pass — from your store in the captive portal. |
| **Require MAC pre-registration.** | Only lets devices you've registered in advance connect. Use it if you want to approve every device. |
## Related
* [Wi-Fi](/integrations/wifi) — who can connect, check-ins, and troubleshooting
* [Passes](/platform/billing/time-passes) — passes that include network access
* [Products](/platform/billing/products) — selling access through your store
This documentation is built and hosted on [Mintlify](https://mintlify.com), a developer documentation platform.
## Captive portal options
| Setting | What it does |
| - | - |
| **Show sign-up button in captive portal.** | Lets people without an account sign up from the captive portal. |
| **Show products store button in captive portal.** | Lets people buy access — for example a day pass — from your store in the captive portal. |
| **Require MAC pre-registration.** | Only lets devices you've registered in advance connect. Use it if you want to approve every device. |
## Related
* [Wi-Fi](/integrations/wifi) — who can connect, check-ins, and troubleshooting
* [Passes](/platform/billing/time-passes) — passes that include network access
* [Products](/platform/billing/products) — selling access through your store
This documentation is built and hosted on [Mintlify](https://mintlify.com), a developer documentation platform.