> ## Documentation Index
> Fetch the complete documentation index at: https://learn.nexudus.com/llms.txt
> Use this file to discover all available pages before exploring further.
# Connect from ChatGPT
> How to connect the Nexudus MCP server to ChatGPT by enabling Developer mode and adding a custom MCP connector.
# Connect from ChatGPT
ChatGPT supports custom MCP servers through **Developer mode**, currently in beta. You enable Developer mode once on your account, add the Nexudus MCP server as a custom connector, and then toggle it on in any chat where you want to use it.
## Prerequisites
* A **ChatGPT** account on a paid plan — Developer mode is available on **Plus, Pro, Business, Enterprise, and Edu** at the time of writing. Free accounts cannot add custom MCP connectors.
* A **Nexudus** account with API access.
* A web browser.
* For **Business / Enterprise / Edu** workspaces: your workspace admin must have enabled **Developer mode / Create custom MCP connectors** under **Workspace Settings → Permissions & Roles → Connected Data**. If the option is missing in your personal settings, ask your admin to turn it on.
Developer mode is a beta feature with elevated risk. It gives ChatGPT full read and write access to whichever MCP servers you connect, and OpenAI
warns users to watch for prompt injection, malicious servers, and unintended write actions. Only add MCP servers you trust — `https://mcp.nexudus.com`
is the official Nexudus server.
## Step 1 — Enable Developer mode
Sign in to [chatgpt.com](https://chatgpt.com), open your profile menu, and choose **Settings**.
In the settings sidebar, open **Apps & Connectors** (sometimes shown as **Connectors**).
Scroll to the bottom of the connectors list and open **Advanced settings**.
Toggle **Developer mode** on. ChatGPT shows a warning about the risks of connecting unverified MCP servers — read it and confirm.
## Step 2 — Add the Nexudus connector
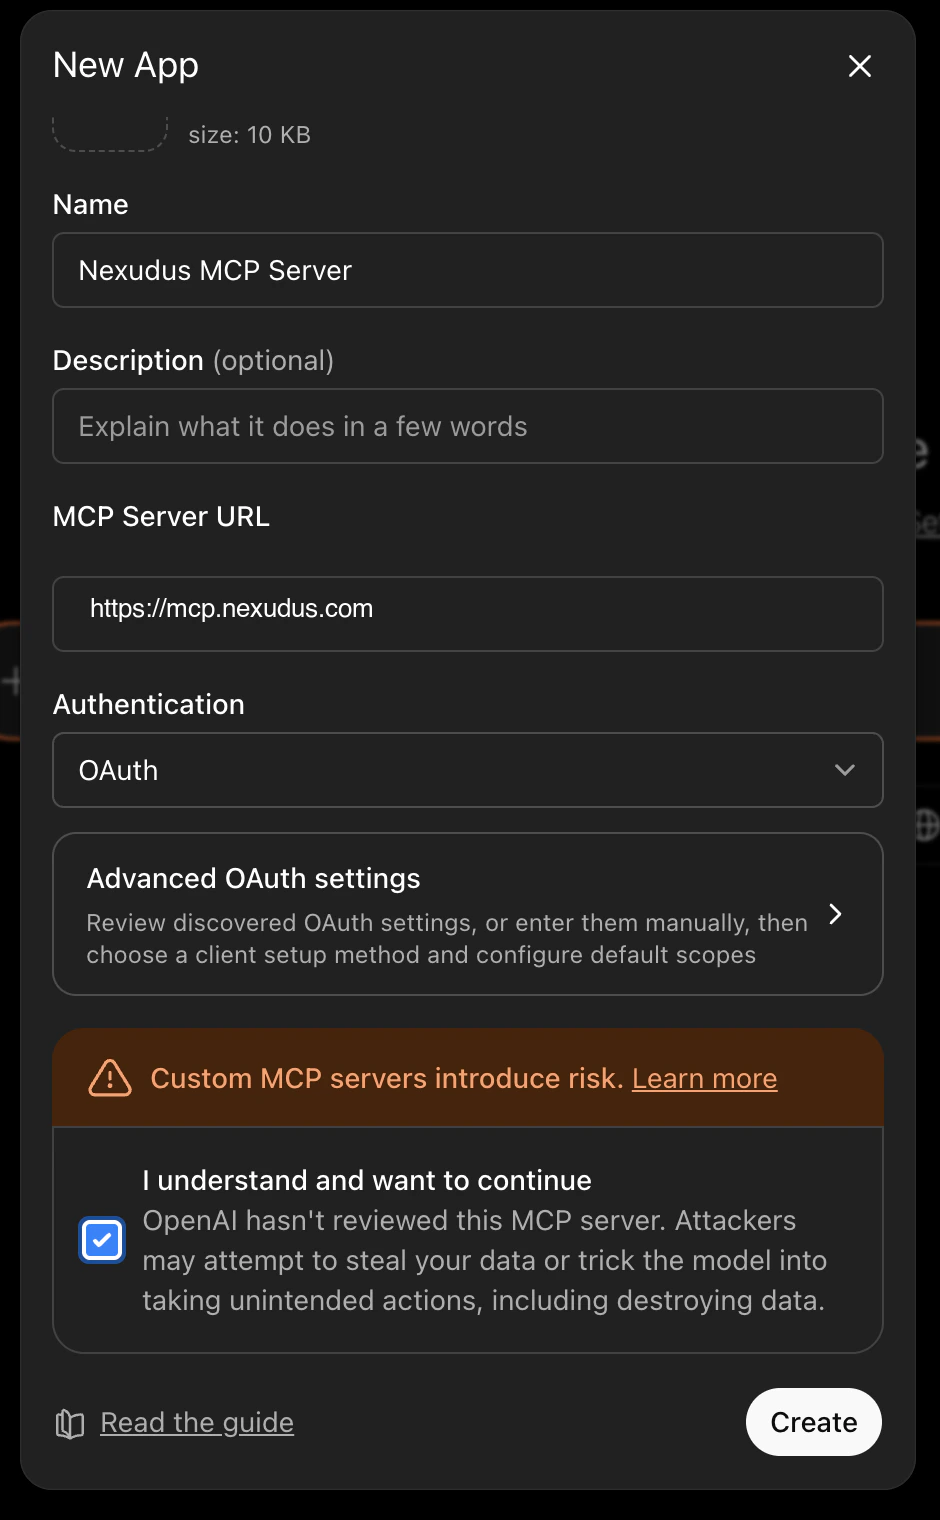
Back in **Apps & Connectors → Advanced settings**, click **Create** (sometimes labelled **Create app**) to add a custom MCP server.
* **Name:** `Nexudus`
* **MCP server URL:** `https://mcp.nexudus.com`
* **Authentication:** OAuth (the default)
* Tick **I understand and want to continue** to acknowledge the Developer mode risk notice.
Save the connector.
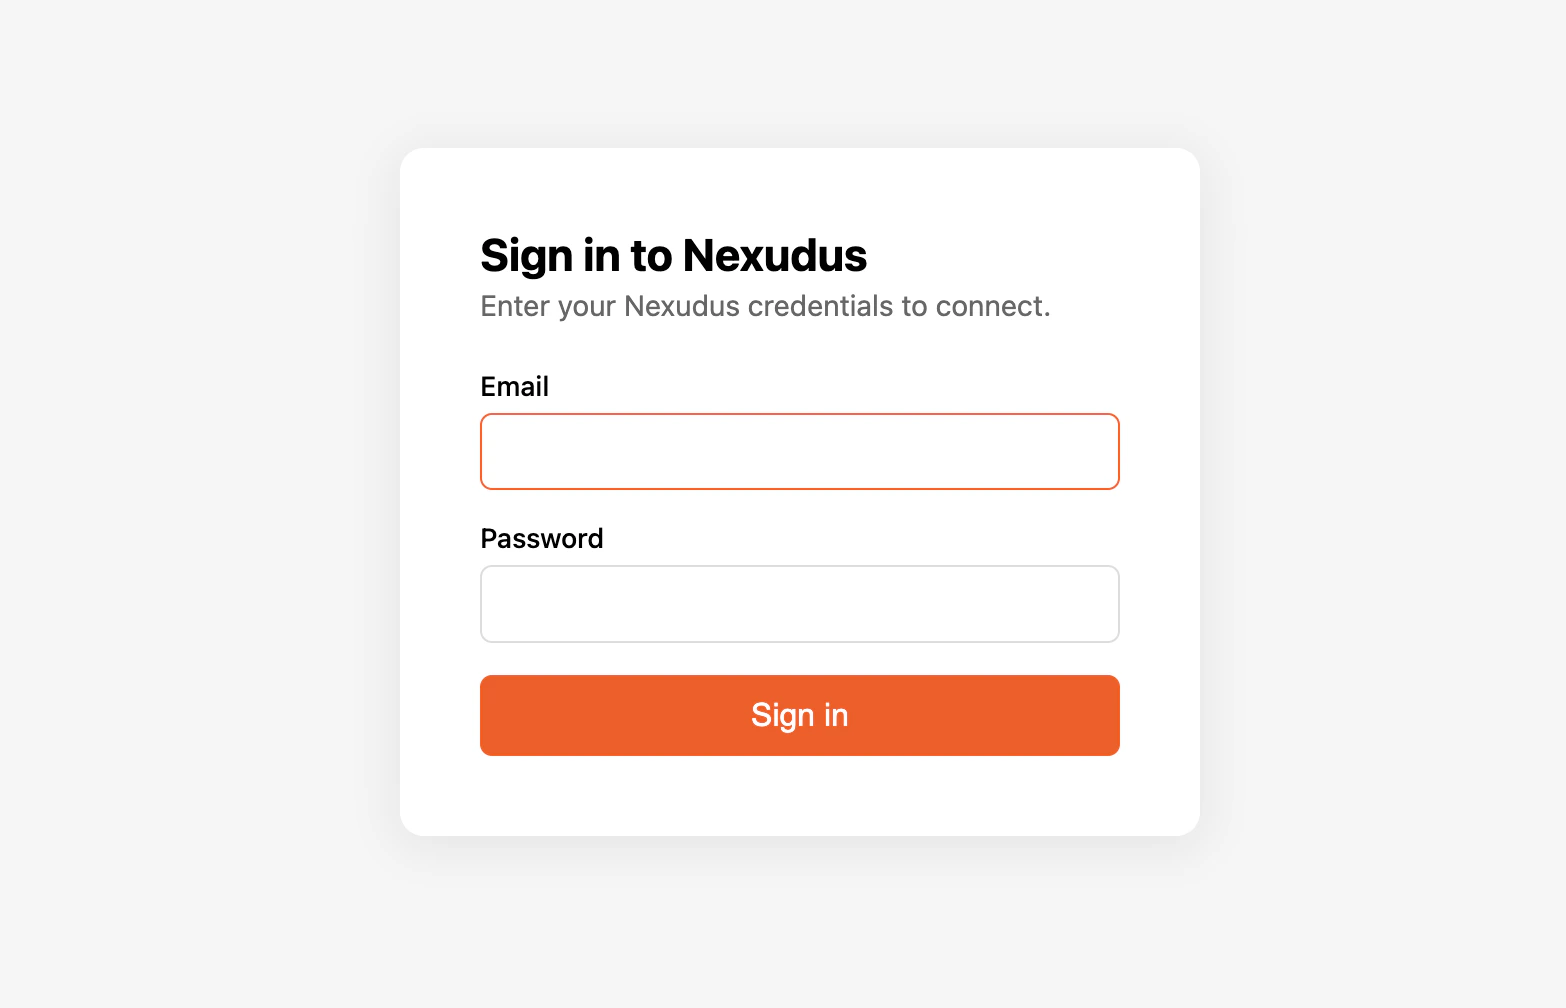
 ChatGPT opens a browser window to the Nexudus login page. Enter your Nexudus email and password and approve the connection. You are
redirected back to ChatGPT, and the connector is marked **Connected**.
ChatGPT opens a browser window to the Nexudus login page. Enter your Nexudus email and password and approve the connection. You are
redirected back to ChatGPT, and the connector is marked **Connected**.
 ## Step 3 — Enable the connector in a chat
Developer mode connectors are off by default in each new chat. To use Nexudus in a conversation:
1. Start a new chat.
2. Open the **Developer mode** tool menu at the bottom of the message box.
3. Toggle **Nexudus** on for the chat.
The composer's border turns **orange** to indicate Developer mode is active and that memory is paused for that chat. After this, ChatGPT can call the Nexudus tools when responding.
## Verify it works
In a chat with the connector enabled, ask:
> *"List my Nexudus locations."*
ChatGPT should call the Nexudus connector and return your locations. If it does not, see [Troubleshooting](/mcp/troubleshooting).
## Things to try
* *"Show me the bookings for today at my main location."*
* *"How many active members do I have?"*
* *"Find the contact named 'Smith' and show their email."*
* *"Update product 12345678 to set its price to £50."*
ChatGPT can create, update, and delete real data through the connector. Always read the proposed action before confirming, especially for destructive
operations like deletions or bulk updates. There is no undo button.
## Disconnect or re-authenticate
To disconnect, return to **Settings → Apps & Connectors → Advanced settings** and remove the Nexudus connector. To re-authenticate after the 8-hour
session expires, open the connector and choose **Reconnect** — ChatGPT walks you back through the login.
## Common issues
| Issue | Solution |
| ------------------------------------------------------------ | ----------------------------------------------------------------------------------------------------- |
| "Create" button is missing in Advanced settings | Developer mode is off — turn it on at **Settings → Apps & Connectors → Advanced settings**. |
| Developer mode toggle is missing entirely | On a Business/Enterprise/Edu workspace, your admin needs to enable it under **Permissions & Roles**. |
| ChatGPT does not see any Nexudus tools | Toggle the Nexudus connector on in the current chat's **Developer mode** menu — it is off by default. |
| ChatGPT reports it cannot reach Nexudus | Reconnect from Settings → Apps & Connectors. The 8-hour session may have expired. |
| The OAuth window does not appear | Disable pop-up blockers in your browser, then retry the connection. |
| ChatGPT picks the wrong field name when creating or updating | Ask it to call `nexudus_describe_entity` first to fetch the field schema. |
For more, see [Troubleshooting](/mcp/troubleshooting).
## Next steps
What the AI assistant can do for you.
Why sessions expire after 8 hours.
## Step 3 — Enable the connector in a chat
Developer mode connectors are off by default in each new chat. To use Nexudus in a conversation:
1. Start a new chat.
2. Open the **Developer mode** tool menu at the bottom of the message box.
3. Toggle **Nexudus** on for the chat.
The composer's border turns **orange** to indicate Developer mode is active and that memory is paused for that chat. After this, ChatGPT can call the Nexudus tools when responding.
## Verify it works
In a chat with the connector enabled, ask:
> *"List my Nexudus locations."*
ChatGPT should call the Nexudus connector and return your locations. If it does not, see [Troubleshooting](/mcp/troubleshooting).
## Things to try
* *"Show me the bookings for today at my main location."*
* *"How many active members do I have?"*
* *"Find the contact named 'Smith' and show their email."*
* *"Update product 12345678 to set its price to £50."*
ChatGPT can create, update, and delete real data through the connector. Always read the proposed action before confirming, especially for destructive
operations like deletions or bulk updates. There is no undo button.
## Disconnect or re-authenticate
To disconnect, return to **Settings → Apps & Connectors → Advanced settings** and remove the Nexudus connector. To re-authenticate after the 8-hour
session expires, open the connector and choose **Reconnect** — ChatGPT walks you back through the login.
## Common issues
| Issue | Solution |
| ------------------------------------------------------------ | ----------------------------------------------------------------------------------------------------- |
| "Create" button is missing in Advanced settings | Developer mode is off — turn it on at **Settings → Apps & Connectors → Advanced settings**. |
| Developer mode toggle is missing entirely | On a Business/Enterprise/Edu workspace, your admin needs to enable it under **Permissions & Roles**. |
| ChatGPT does not see any Nexudus tools | Toggle the Nexudus connector on in the current chat's **Developer mode** menu — it is off by default. |
| ChatGPT reports it cannot reach Nexudus | Reconnect from Settings → Apps & Connectors. The 8-hour session may have expired. |
| The OAuth window does not appear | Disable pop-up blockers in your browser, then retry the connection. |
| ChatGPT picks the wrong field name when creating or updating | Ask it to call `nexudus_describe_entity` first to fetch the field schema. |
For more, see [Troubleshooting](/mcp/troubleshooting).
## Next steps
What the AI assistant can do for you.
Why sessions expire after 8 hours.