> ## Documentation Index
> Fetch the complete documentation index at: https://learn.nexudus.com/llms.txt
> Use this file to discover all available pages before exploring further.
# Forms
> How to build custom forms, send them to customers by invite link, and review the responses they collect.
## Overview
**Forms** are a set of questions you can publish online for anyone to complete, or send directly to specific customers and prospects. Use them for anything that needs structured input — applications, dietary requirements, plan details — without a dedicated feature for it. Each submission comes back as a **response** you can review.
## How to access
Navigate to **Community → Forms** in the dashboard. All submissions across your forms appear under **All answers**.
 ## The list
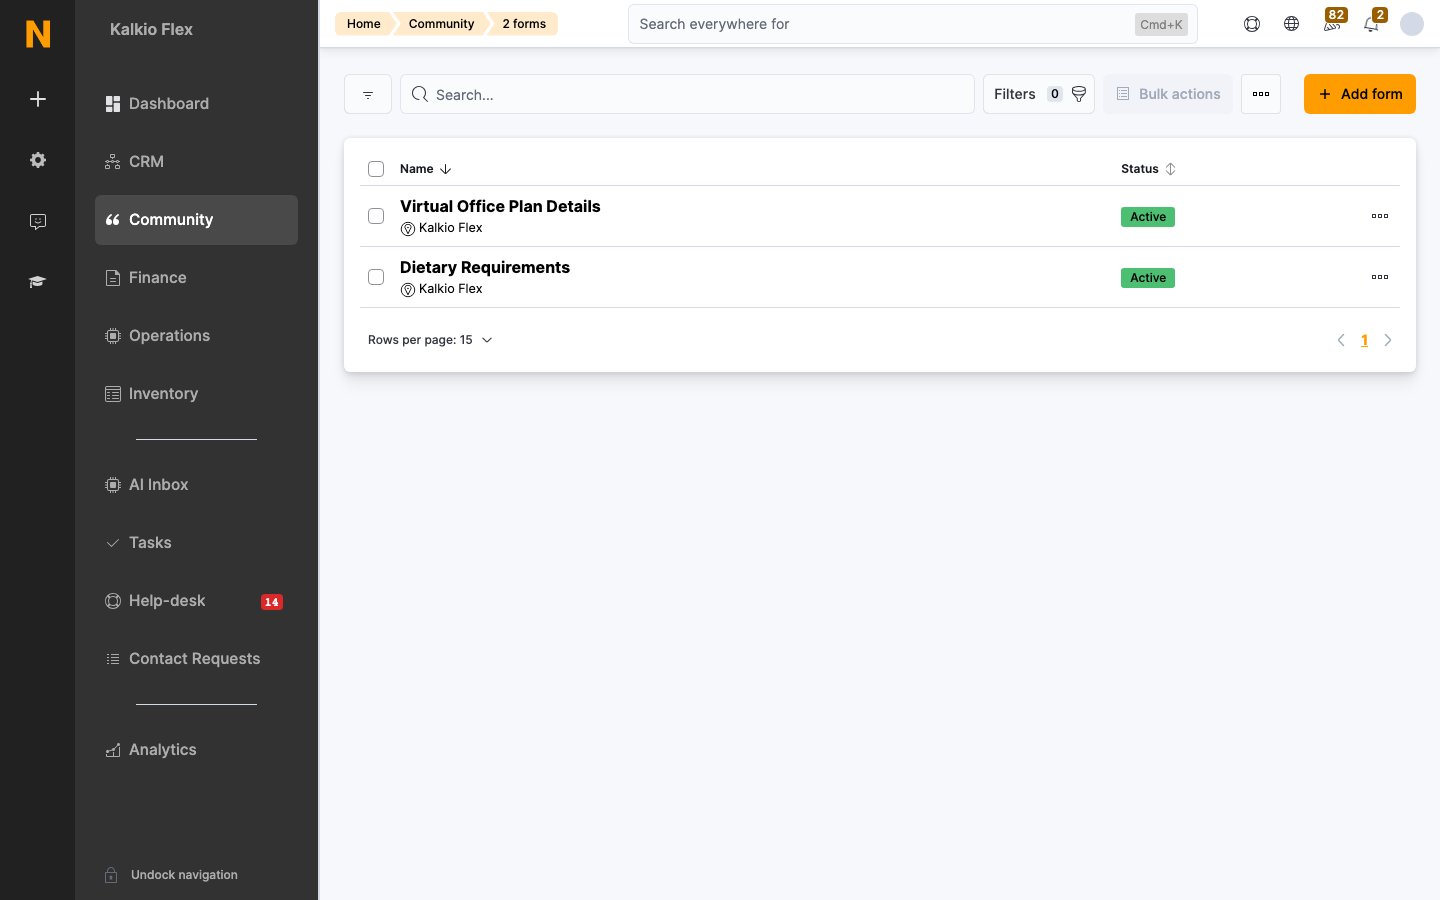
Each row shows:
| Column | Description |
| - | - |
| **Name** | The form name, with its location. |
| **Status** | **Active** or **Inactive** — only active forms can be submitted. |
Use the **Add form** button to create a new one.
## Creating a form
Go to **Community → Forms** and click **Add form**.
Set the **Location**, **Name**, and an optional **Description**. Tick **This form is active** so people can submit it. Optionally choose a CRM stage — anyone who submits the form is added to that [CRM board](/platform/crm/boards) stage automatically.
## The list
Each row shows:
| Column | Description |
| - | - |
| **Name** | The form name, with its location. |
| **Status** | **Active** or **Inactive** — only active forms can be submitted. |
Use the **Add form** button to create a new one.
## Creating a form
Go to **Community → Forms** and click **Add form**.
Set the **Location**, **Name**, and an optional **Description**. Tick **This form is active** so people can submit it. Optionally choose a CRM stage — anyone who submits the form is added to that [CRM board](/platform/crm/boards) stage automatically.
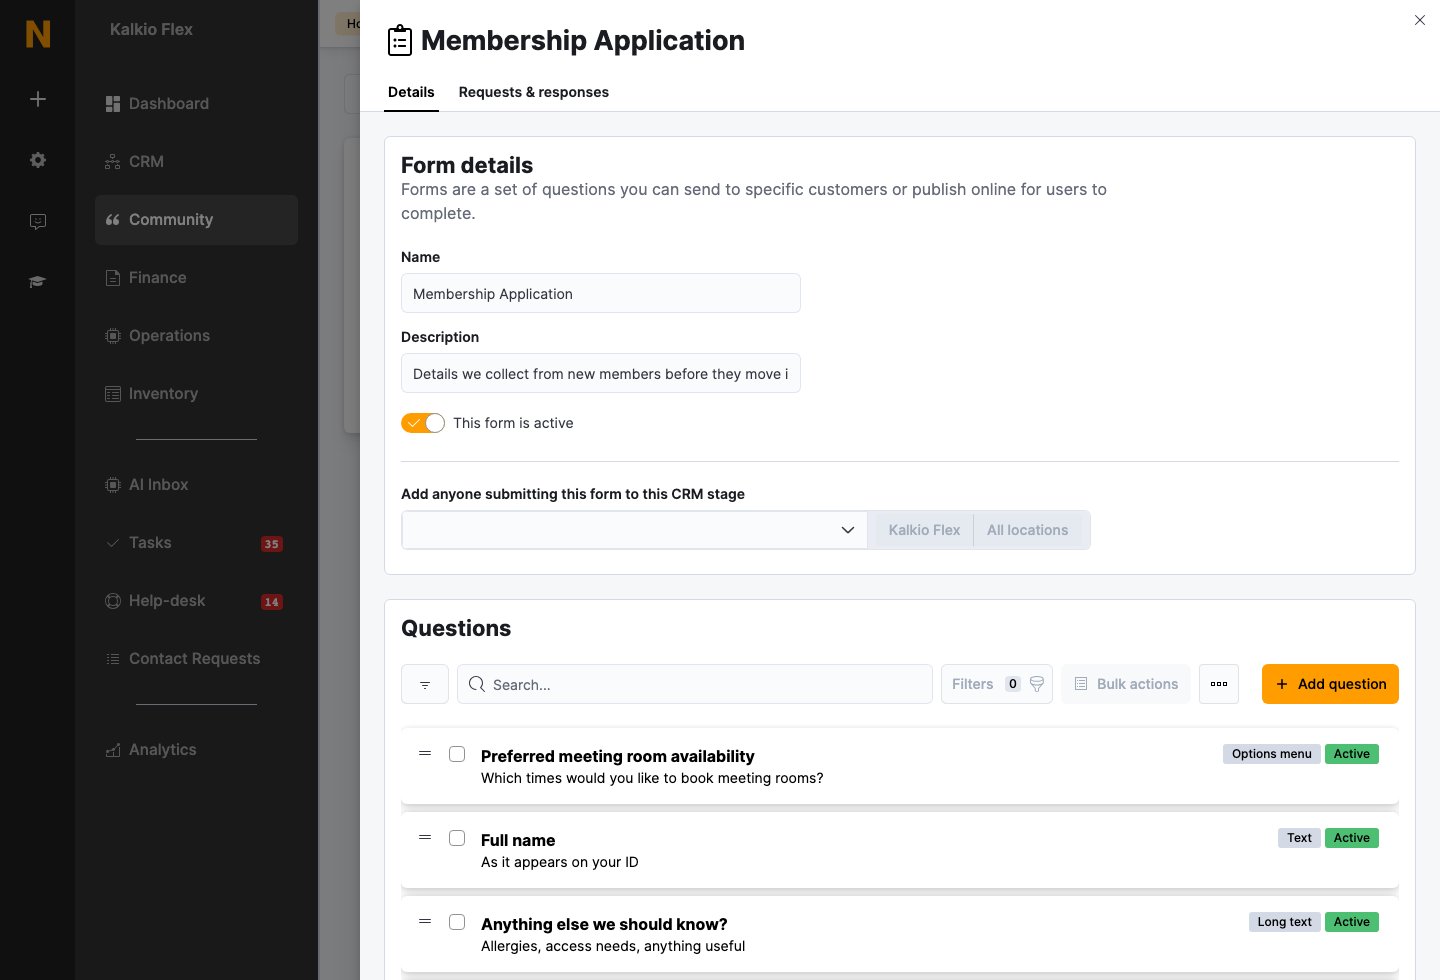 In the **Questions** section, add each field in the order customers should answer them.
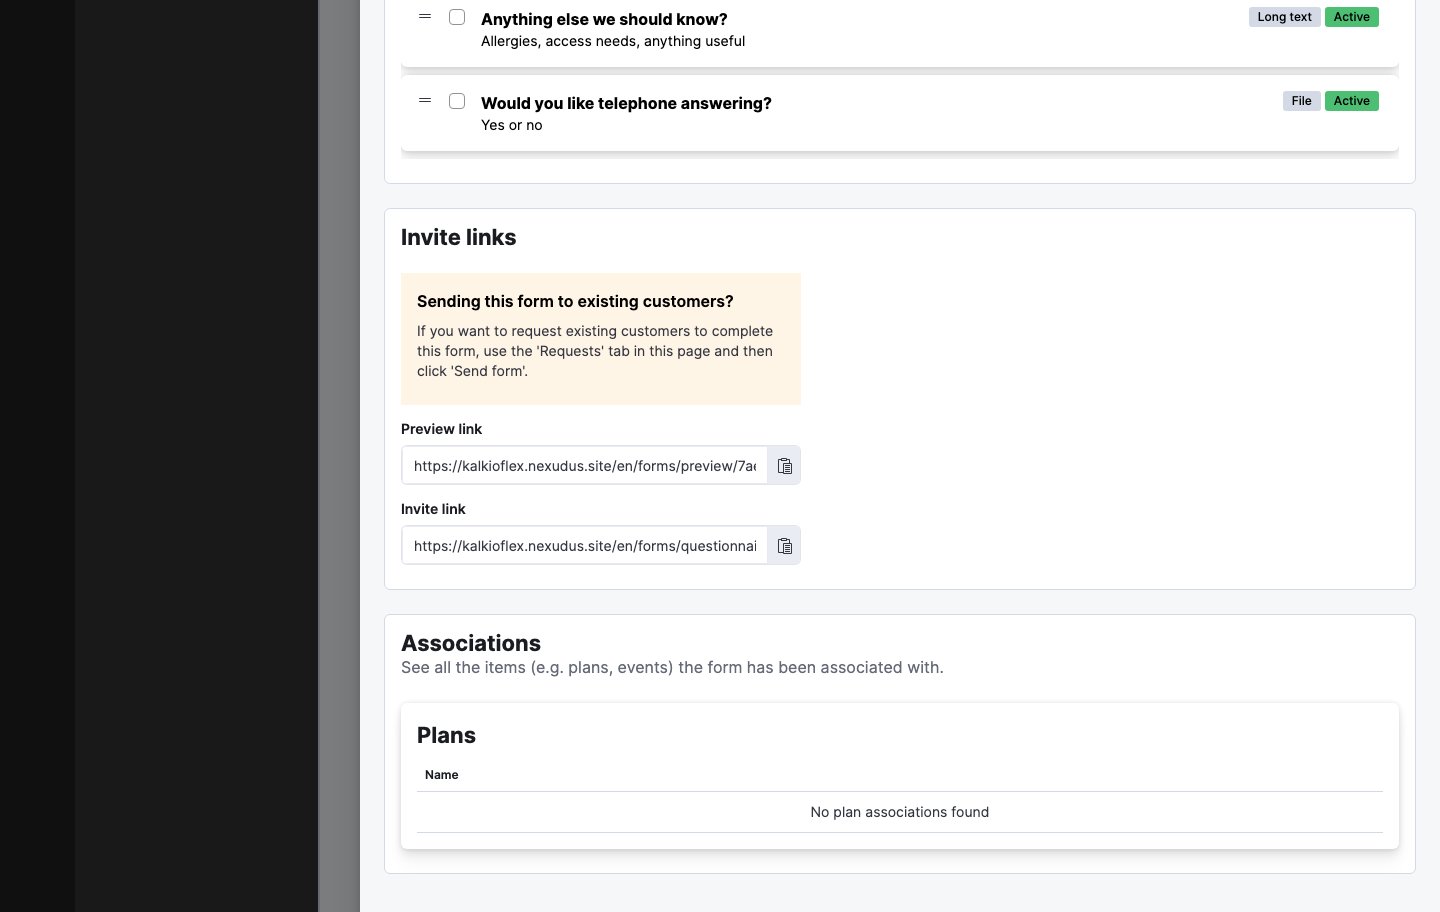 Copy the **Preview link** (what you see before submitting) or the **Invite link** (a page where customers fill it in).
## Question types
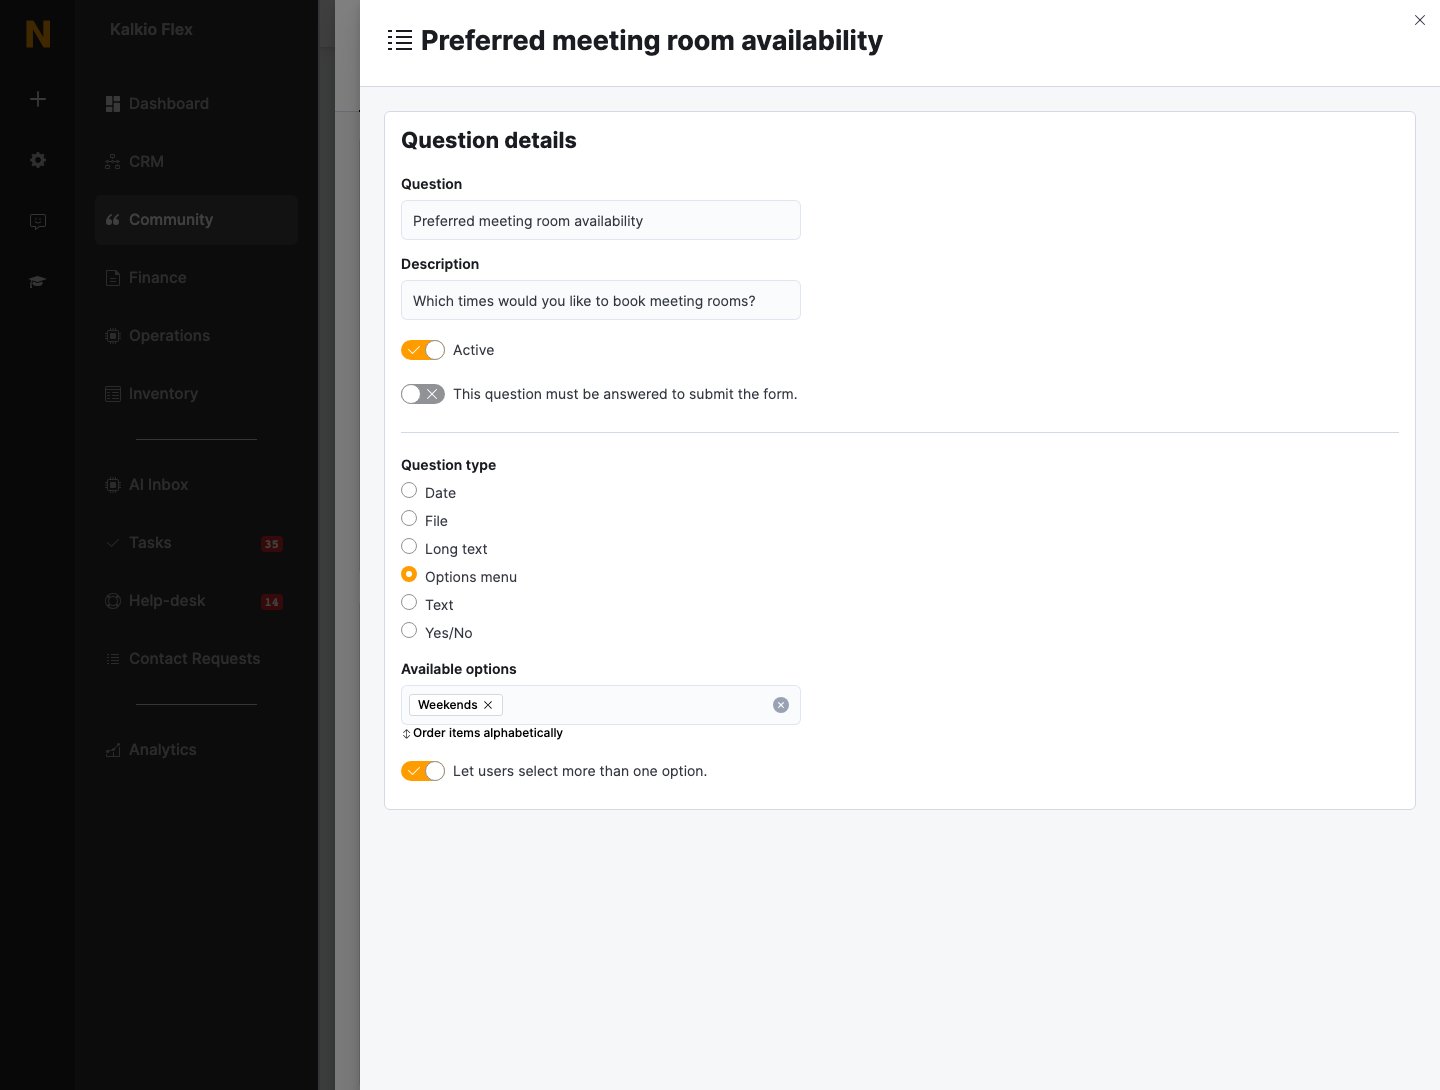
Each question has a **Question** text, an optional **Description**, an **Active** toggle, and a **This question must be answered to submit the form** requirement flag. Choose from these types:
| Type | What it collects |
| - | - |
| **Text** | A short single-line answer. |
| **Yes/No** | A boolean choice. |
| **Long text** | A multi-line paragraph answer. |
| **Date** | A calendar date. |
| **Options menu** | Pick from a list of **Available options** you define. Tick **Let users select more than one option** for multi-select. |
| **File** | A file upload. |
Click any question in the list to edit it:
Copy the **Preview link** (what you see before submitting) or the **Invite link** (a page where customers fill it in).
## Question types
Each question has a **Question** text, an optional **Description**, an **Active** toggle, and a **This question must be answered to submit the form** requirement flag. Choose from these types:
| Type | What it collects |
| - | - |
| **Text** | A short single-line answer. |
| **Yes/No** | A boolean choice. |
| **Long text** | A multi-line paragraph answer. |
| **Date** | A calendar date. |
| **Options menu** | Pick from a list of **Available options** you define. Tick **Let users select more than one option** for multi-select. |
| **File** | A file upload. |
Click any question in the list to edit it:
 ## Sending forms to existing customers
The **Requests & responses** tab on a form is where you push a form out to specific people. Click **Send form** to request that existing customers complete it — the response then shows up in the list with a **Pending** status until they submit.
## Reviewing responses
From the form's **Requests & responses** tab, or the central **All answers** list, each row shows:
| Column | Description |
| - | - |
| **Form** | Which form the response belongs to. |
| **Customer** | Who submitted (or was sent) it. |
| **Status** | **Submitted** or **Pending** (sent but not yet completed). |
| **Sent on** | When the form was requested from the customer. |
Open a response to read the answers.
Keep forms short and every question purposeful. Mark only the essentials as required — optional fields lower the barrier to submitting.
## Where else forms appear
Forms aren't limited to their own invite links — you can attach them to other parts of the platform:
* **CRM stages.** When creating a form, choose **Add anyone submitting this form to this CRM stage** to drop every submitter straight into a [CRM board](/platform/crm/boards) stage — useful for turning applications into opportunities.
* **Plan onboarding.** A [plan](/platform/virtual-offices/plans) can be set to send a custom onboarding form to customers after they purchase. See [Onboarding and compliance](/platform/virtual-offices/onboarding-and-compliance).
* **Events.** Each [event](/platform/content/events) can have a **Pre-event form** sent to registered attendees, with an optional reminder email. Completed submissions appear on the event's [Form Answers](/platform/content/events/attendees#form-answers) tab.
## Related
* [Surveys](/platform/content/surveys) — scheduled feedback questionnaires
* [Editor](/editor/overview) — embedding forms into custom portal pages
This documentation is built and hosted on [Mintlify](https://mintlify.com), a developer documentation platform.
## Sending forms to existing customers
The **Requests & responses** tab on a form is where you push a form out to specific people. Click **Send form** to request that existing customers complete it — the response then shows up in the list with a **Pending** status until they submit.
## Reviewing responses
From the form's **Requests & responses** tab, or the central **All answers** list, each row shows:
| Column | Description |
| - | - |
| **Form** | Which form the response belongs to. |
| **Customer** | Who submitted (or was sent) it. |
| **Status** | **Submitted** or **Pending** (sent but not yet completed). |
| **Sent on** | When the form was requested from the customer. |
Open a response to read the answers.
Keep forms short and every question purposeful. Mark only the essentials as required — optional fields lower the barrier to submitting.
## Where else forms appear
Forms aren't limited to their own invite links — you can attach them to other parts of the platform:
* **CRM stages.** When creating a form, choose **Add anyone submitting this form to this CRM stage** to drop every submitter straight into a [CRM board](/platform/crm/boards) stage — useful for turning applications into opportunities.
* **Plan onboarding.** A [plan](/platform/virtual-offices/plans) can be set to send a custom onboarding form to customers after they purchase. See [Onboarding and compliance](/platform/virtual-offices/onboarding-and-compliance).
* **Events.** Each [event](/platform/content/events) can have a **Pre-event form** sent to registered attendees, with an optional reminder email. Completed submissions appear on the event's [Form Answers](/platform/content/events/attendees#form-answers) tab.
## Related
* [Surveys](/platform/content/surveys) — scheduled feedback questionnaires
* [Editor](/editor/overview) — embedding forms into custom portal pages
This documentation is built and hosted on [Mintlify](https://mintlify.com), a developer documentation platform.