> ## Documentation Index
> Fetch the complete documentation index at: https://learn.nexudus.com/llms.txt
> Use this file to discover all available pages before exploring further.
# Message Macros
> How to create reusable message macros for consistent, fast communication with customers.
## Overview
**Message macros** are reusable blocks of message content. Write the wording once, then reuse it in manual messages, [reminders](/platform/crm/reminders), and CRM board stage actions wherever you need it. They keep your team's tone consistent and make routine messages fast to send.
A macro has a **subject line** and a **body**. Both support **dynamic tokens** — placeholders that Nexudus replaces with live customer data (name, plan, invoice totals, and more) each time the message is sent.
## How to access
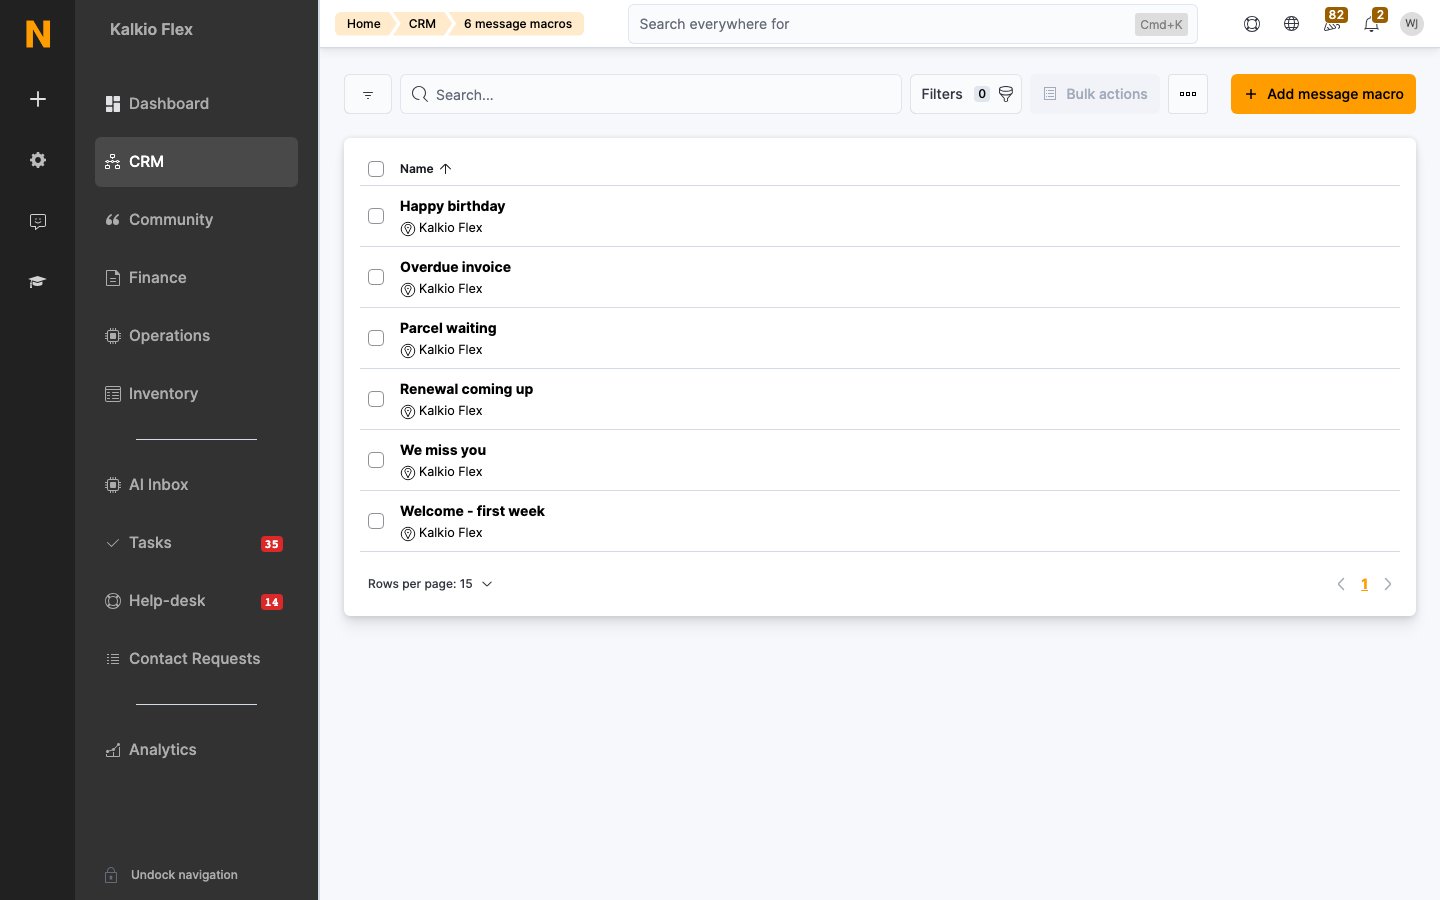
Navigate to **CRM → Tasks & documents → Documents**, then select **Message macros** from the sub-menu.
 ## Key concepts
* **Macro vs. message.** A macro is a saved starting point; a message is what actually gets sent. Editing a macro does not change messages that were already sent.
* **Dynamic tokens.** In the body editor, open the **Dynamic tokens** panel to insert personalisation fields — member name, current and next plan, unpaid or due invoices, location details, dates, and more. Each token is replaced with the customer's live value when the message is sent.
* **Location.** Every macro is attached to a location, but it can be used to message customers in *any* location, not just the one it was created under.
* **Used by automations.** Reminders and CRM board stage actions reference a macro, so updating a macro updates every future send that uses it.
## Creating a macro
Go to **CRM → Tasks & documents → Documents → Message macros** and click **Add message macro**.
Choose the **Location** the macro belongs to. This does not limit where it can be sent from.
Give it a clear **Name** that describes when to use it (e.g. "Welcome — new member"), and set the **Subject** line shown in the customer's inbox.
Compose the **Contents** in the rich-text editor. Open the **Dynamic tokens** panel to insert personalisation fields where the content varies per customer.
Save the macro. It is now available in message composition, reminder configuration, and CRM board stage actions.
## Using a macro
* **In a manual message:** when composing a message to a customer, choose the macro from the **Message macro** field. Its subject and body are filled in automatically and can still be edited before sending.
* **In a reminder:** set **How to deliver this reminder** to **Send message macro with your own content**, then pick the macro. Every triggered send uses the same wording.
* **In a CRM board stage action:** point a board column's action at a macro so that moving an opportunity into that stage emails it automatically.
Review your macros periodically. Wording that referenced a plan you've since retired, or a process that has changed, will quietly go stale in every automation that uses it.
## Related
* [Reminders](/platform/crm/reminders) — automated sends built on macros
* [Boards](/platform/crm/boards) — stage actions that fire a macro
* [Email accounts](/platform/crm/email-accounts) — the connections that deliver and receive mail
This documentation is built and hosted on [Mintlify](https://mintlify.com), a developer documentation platform.
## Key concepts
* **Macro vs. message.** A macro is a saved starting point; a message is what actually gets sent. Editing a macro does not change messages that were already sent.
* **Dynamic tokens.** In the body editor, open the **Dynamic tokens** panel to insert personalisation fields — member name, current and next plan, unpaid or due invoices, location details, dates, and more. Each token is replaced with the customer's live value when the message is sent.
* **Location.** Every macro is attached to a location, but it can be used to message customers in *any* location, not just the one it was created under.
* **Used by automations.** Reminders and CRM board stage actions reference a macro, so updating a macro updates every future send that uses it.
## Creating a macro
Go to **CRM → Tasks & documents → Documents → Message macros** and click **Add message macro**.
Choose the **Location** the macro belongs to. This does not limit where it can be sent from.
Give it a clear **Name** that describes when to use it (e.g. "Welcome — new member"), and set the **Subject** line shown in the customer's inbox.
Compose the **Contents** in the rich-text editor. Open the **Dynamic tokens** panel to insert personalisation fields where the content varies per customer.
Save the macro. It is now available in message composition, reminder configuration, and CRM board stage actions.
## Using a macro
* **In a manual message:** when composing a message to a customer, choose the macro from the **Message macro** field. Its subject and body are filled in automatically and can still be edited before sending.
* **In a reminder:** set **How to deliver this reminder** to **Send message macro with your own content**, then pick the macro. Every triggered send uses the same wording.
* **In a CRM board stage action:** point a board column's action at a macro so that moving an opportunity into that stage emails it automatically.
Review your macros periodically. Wording that referenced a plan you've since retired, or a process that has changed, will quietly go stale in every automation that uses it.
## Related
* [Reminders](/platform/crm/reminders) — automated sends built on macros
* [Boards](/platform/crm/boards) — stage actions that fire a macro
* [Email accounts](/platform/crm/email-accounts) — the connections that deliver and receive mail
This documentation is built and hosted on [Mintlify](https://mintlify.com), a developer documentation platform.