

Connect from VS Code (GitHub Copilot)
GitHub Copilot in VS Code supports MCP servers through the MCP settings in the Copilot extension. Once added, Copilot’s chat panel can call Nexudus tools alongside its other capabilities.Prerequisites
- VS Code with the GitHub Copilot extension installed and signed in.
- A GitHub Copilot subscription that supports MCP servers (Business or Enterprise at the time of writing — check your plan in VS Code).
- A Nexudus account with API access.
Add the Nexudus server
VS Code stores MCP server entries in a JSON config file. The easiest way to add Nexudus is via the command palette.1
Open Agent Customizations
From the VS Code activity bar, open Agent Customizations (or run MCP: Add Server from the command palette with Cmd/Ctrl + Shift + P).
2
Add a new MCP server
In the MCP Servers section, click the + button to add a new server.
3
Choose the HTTP transport
From the list, select HTTP (HTTP or Server-Sent Events) — “Connect to a remote HTTP server that implements the MCP protocol”.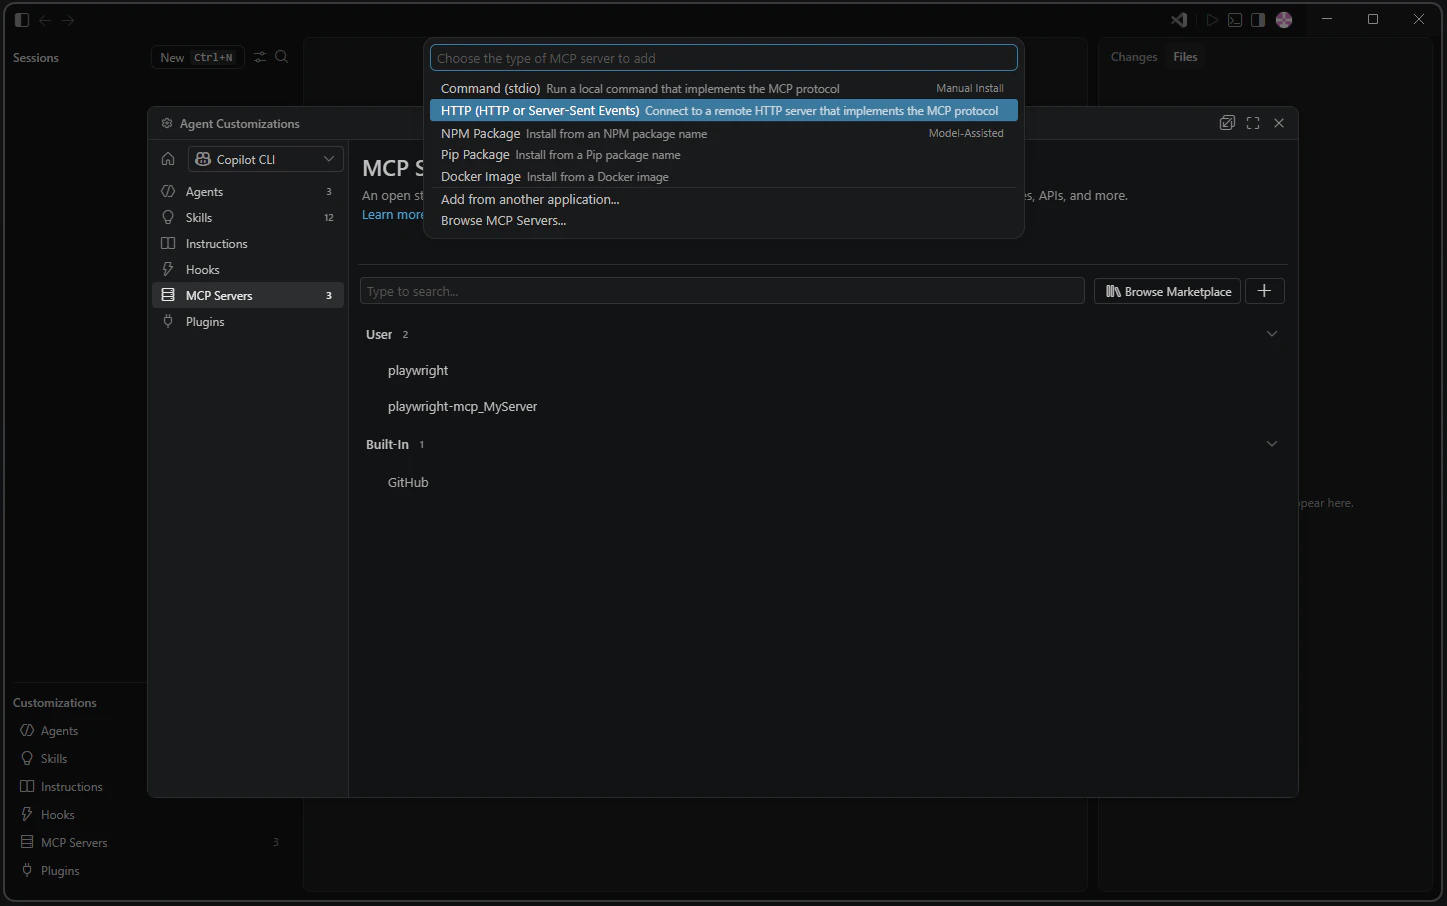
4
Enter the Nexudus server URL
Paste 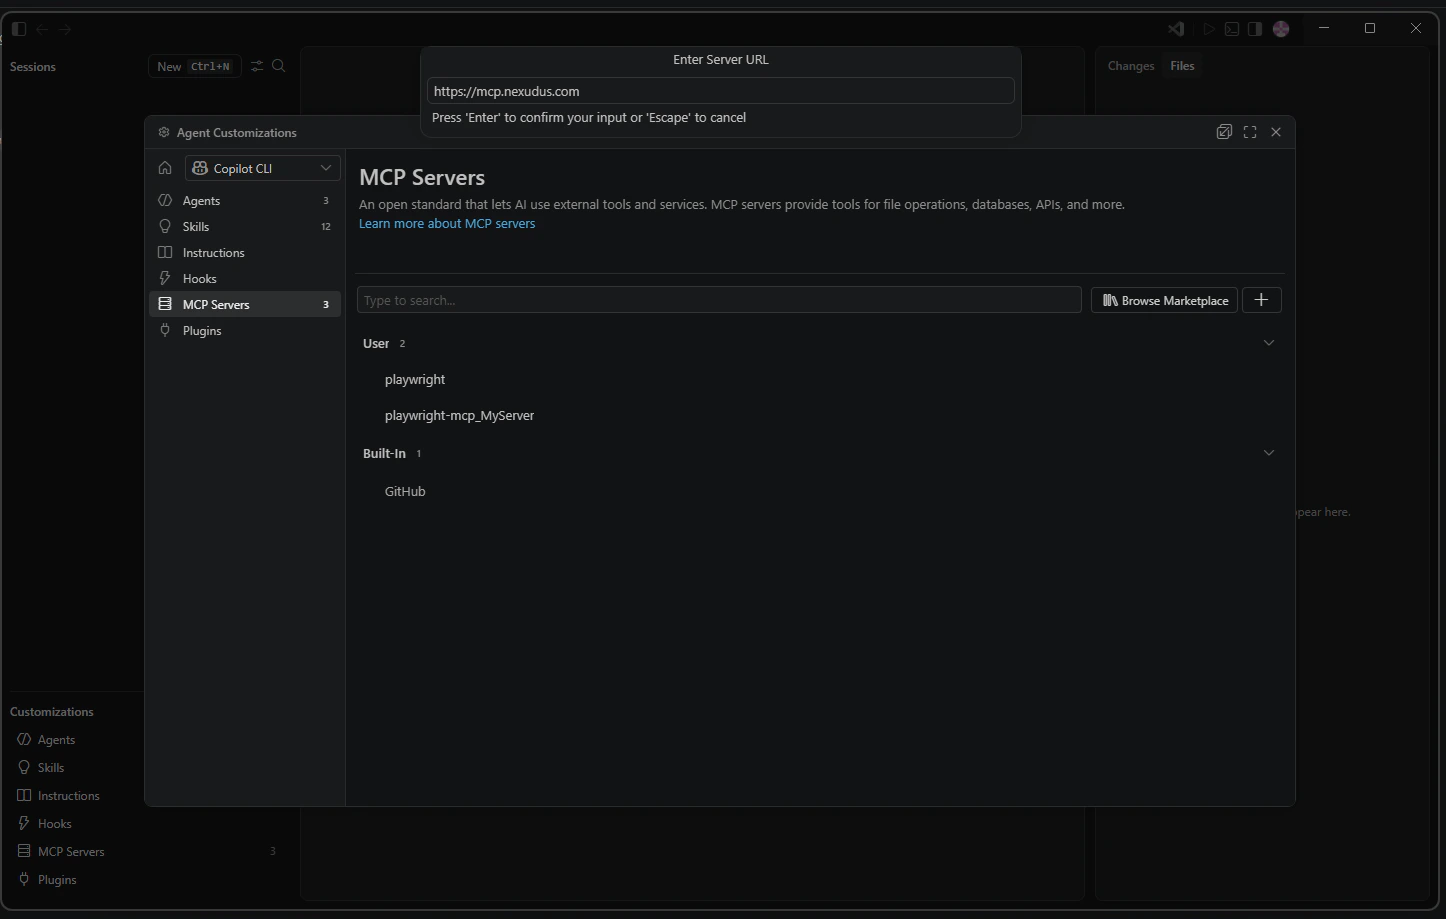
https://mcp.nexudus.com into the Enter Server URL field and press Enter.5
Give it a name
When prompted, give the server a name (for example, 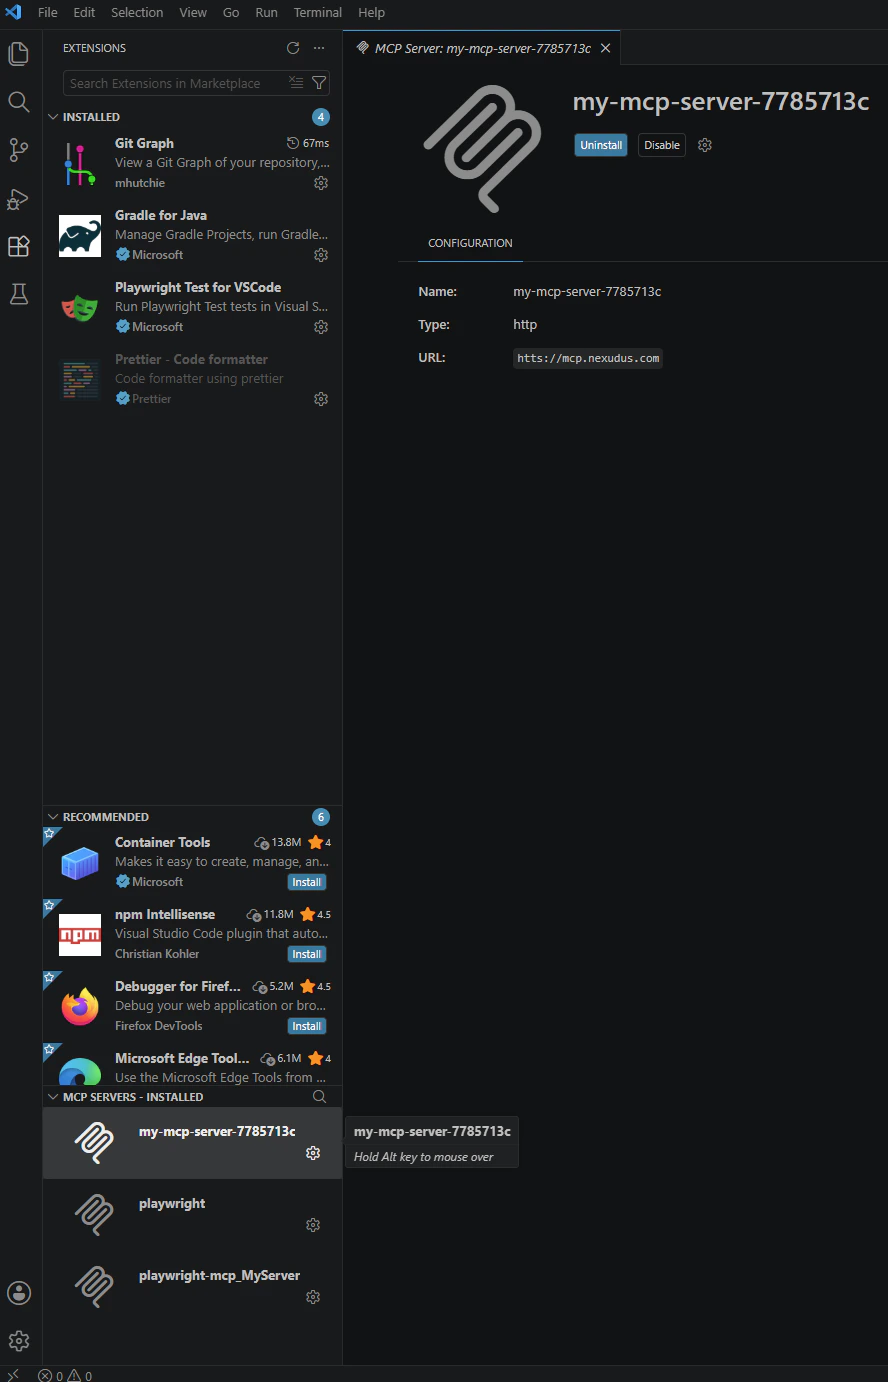
nexudus). The server appears in the MCP Servers list once registered.6
Approve the authentication
VS Code prompts you to allow the server to authenticate. Click Allow.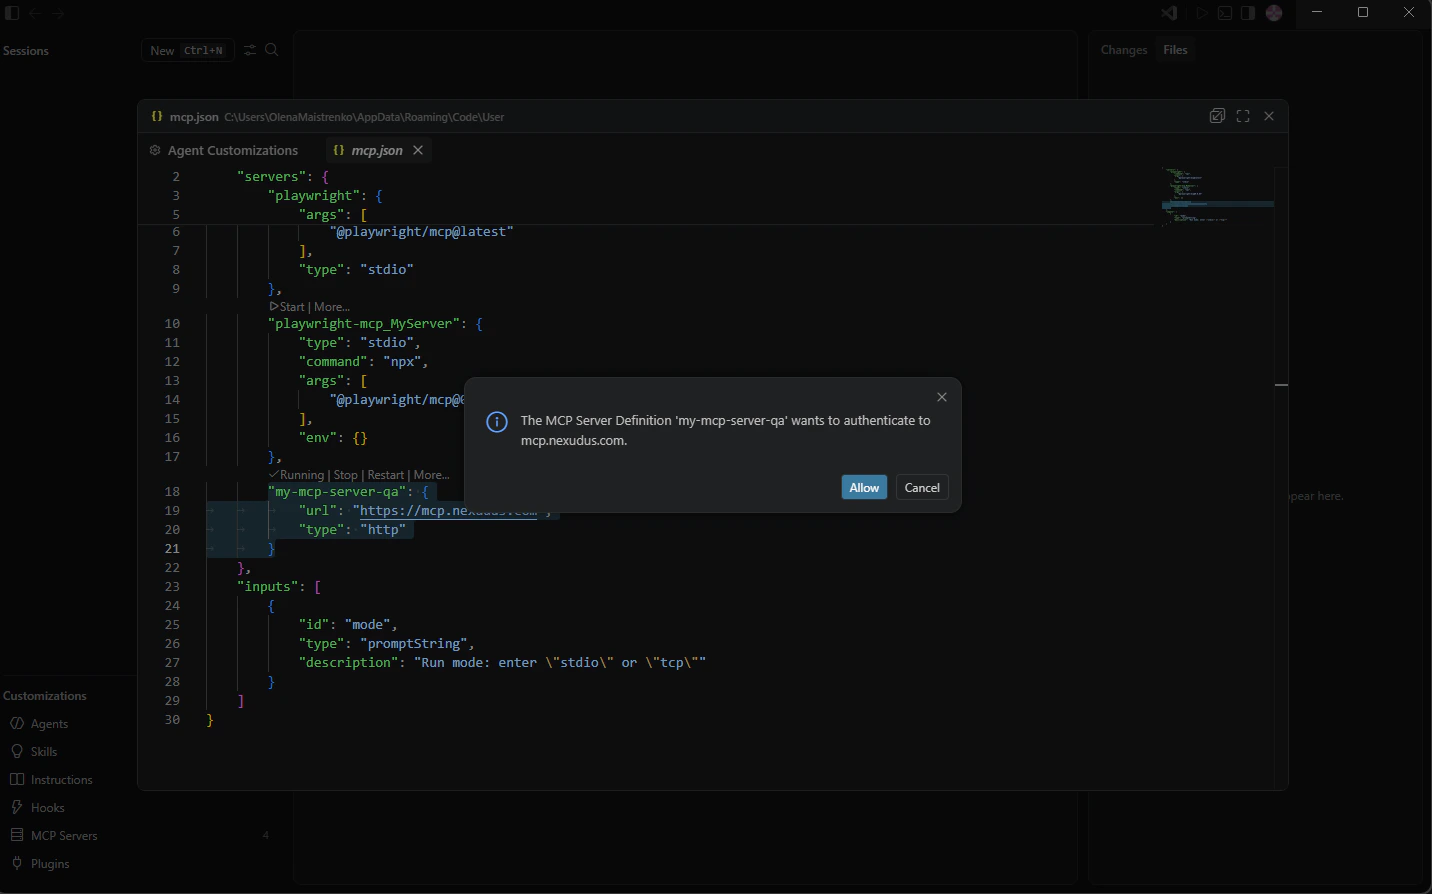
7
Sign in to Nexudus
VS Code opens your default browser to the Nexudus login page. Enter your Nexudus email and password and approve the connection. The
browser redirects back to VS Code and the server appears as Connected.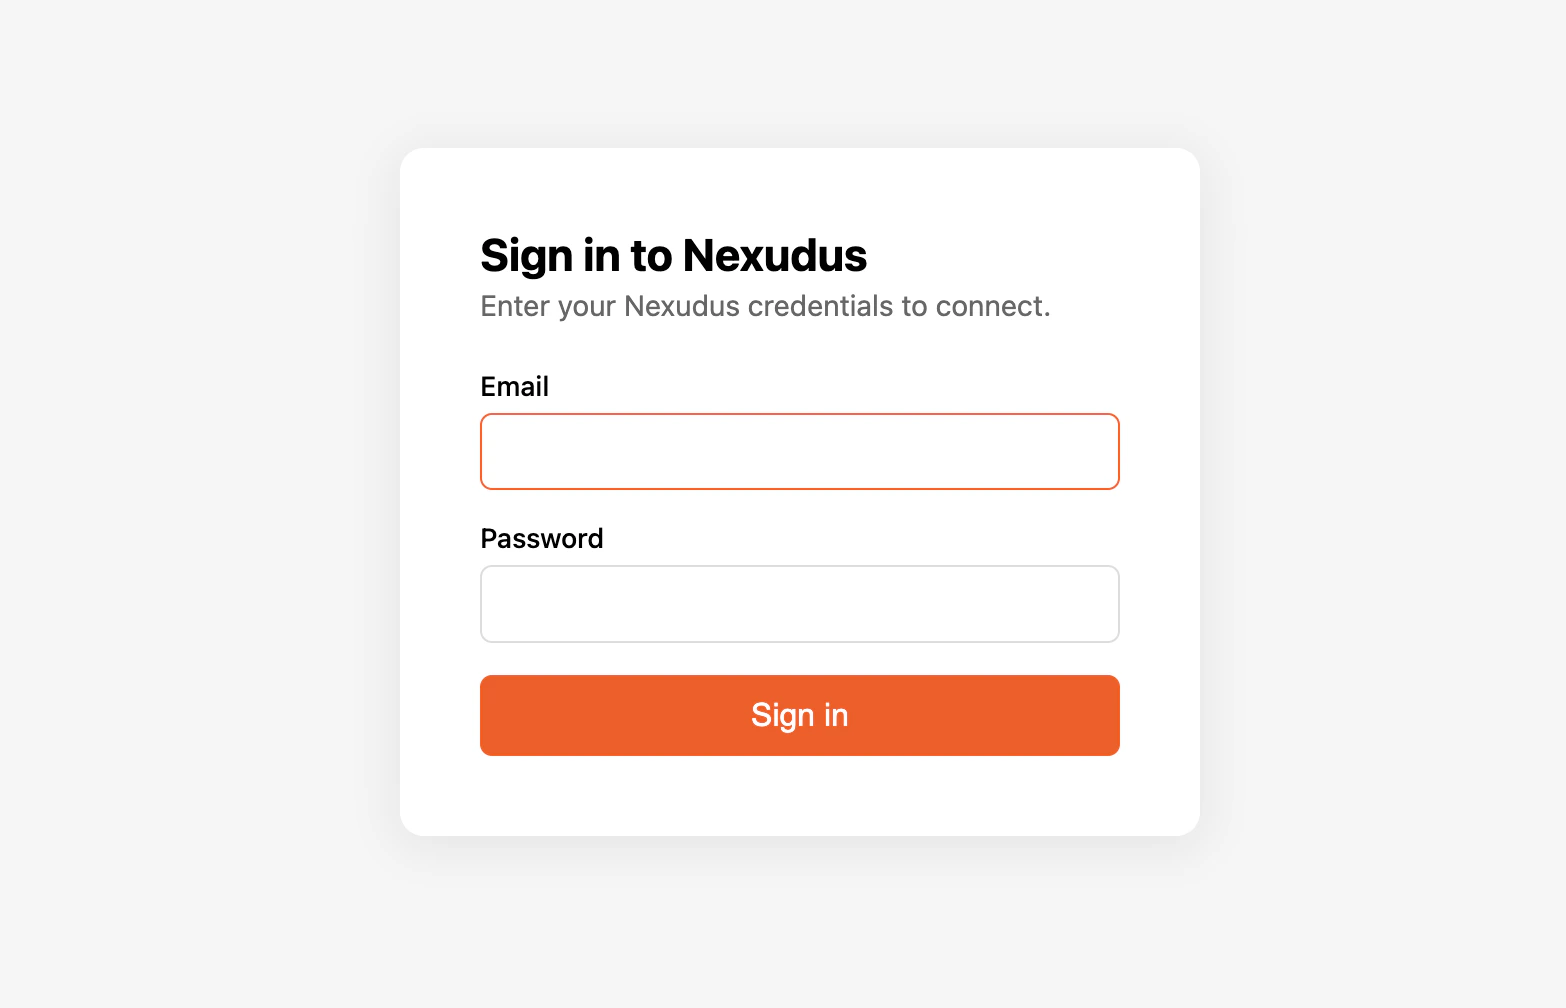
Add manually via settings
If you prefer to edit the config directly, open the command palette and run MCP: Open User Configuration. Add an entry:Verify it works
Open the Copilot chat panel and ask:“List my Nexudus locations.”Copilot should call the Nexudus server. The chat panel shows the tool call and the response inline.
Things to try
- “Generate a CSV of all bookings for last week, one row per booking.”
- “List the meeting rooms at my main location and their hourly rates.”
- “Create a new event called ‘Community Coffee’ next Friday at 10am.”
Disconnect or re-authenticate
Open the command palette and run MCP: Manage Servers to remove or reconnect Nexudus. After the 8-hour session expires, Copilot’s tool calls return an auth error — reconnect from the same menu.Common issues
For more, see Troubleshooting.
Next steps
Available tools
What the AI assistant can do for you.
Sessions and re-auth
Why sessions expire after 8 hours.