Documentation Index

Fetch the complete documentation index at: https://learn.nexudus.com/llms.txt

Use this file to discover all available pages before exploring further.

Overview

The Check-ins section shows you who is currently on-site at your location and their visit history. Customers check in when they arrive and check out when they leave — either manually, via door access activity, WiFi network detection, automation tiles, sensors, or automatically when a booking starts. Check-ins are tied to passes, which represent a customer’s entitlement to access your space. When a customer checks in, the system validates that they have a valid pass (from their plan or a standalone pass) and deducts usage time accordingly. If a check-in attempt fails (e.g., no valid pass, account disabled, plan limits exceeded), it’s recorded as a failed check-in for review.

How to access

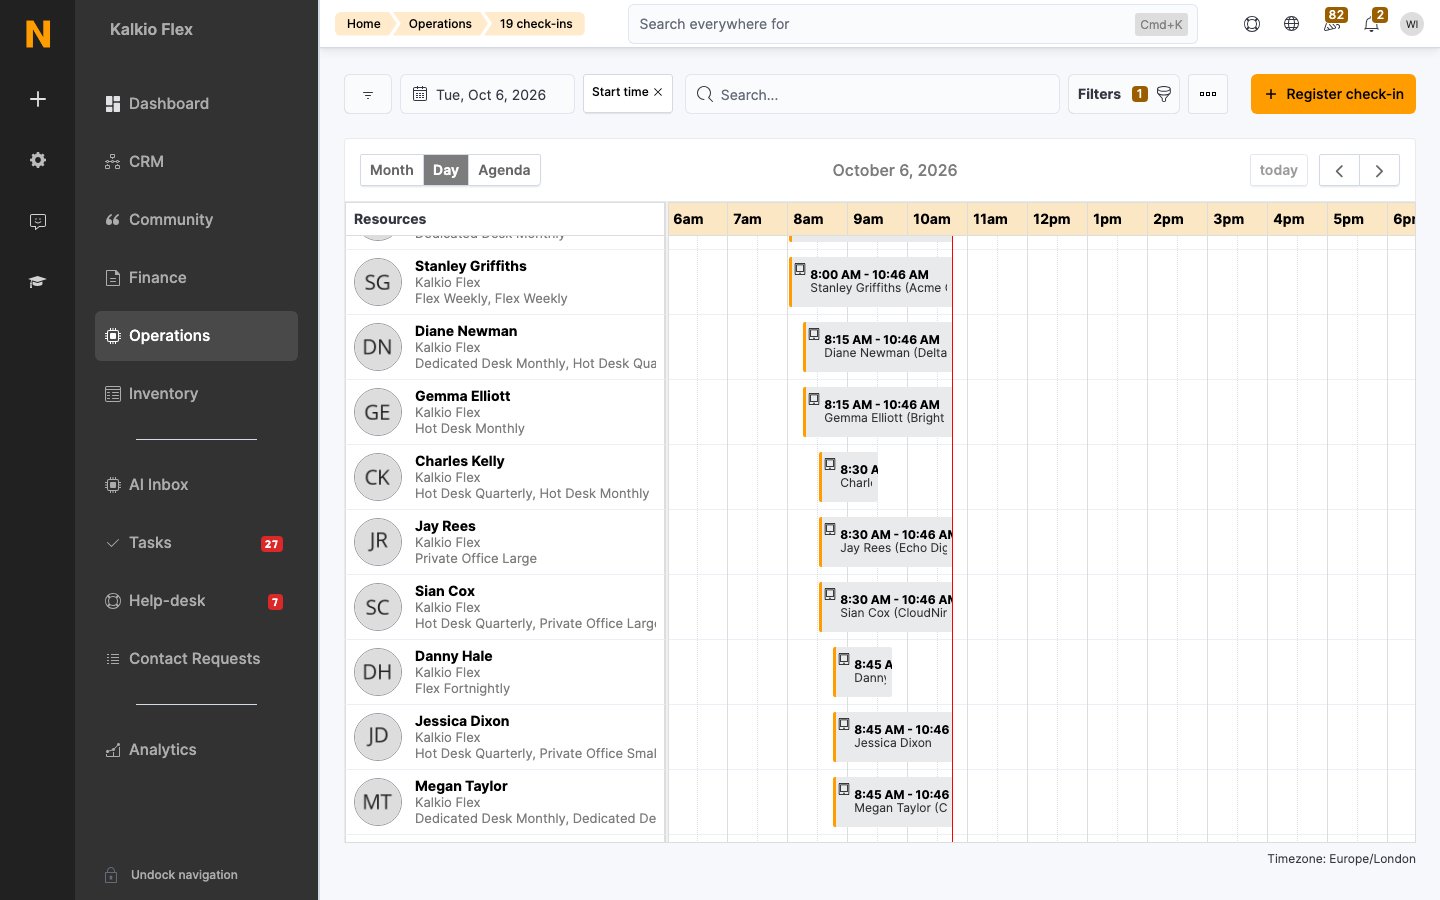
  • Check-ins calendar: Navigate to Operations → Access & Check-in → Customers on site
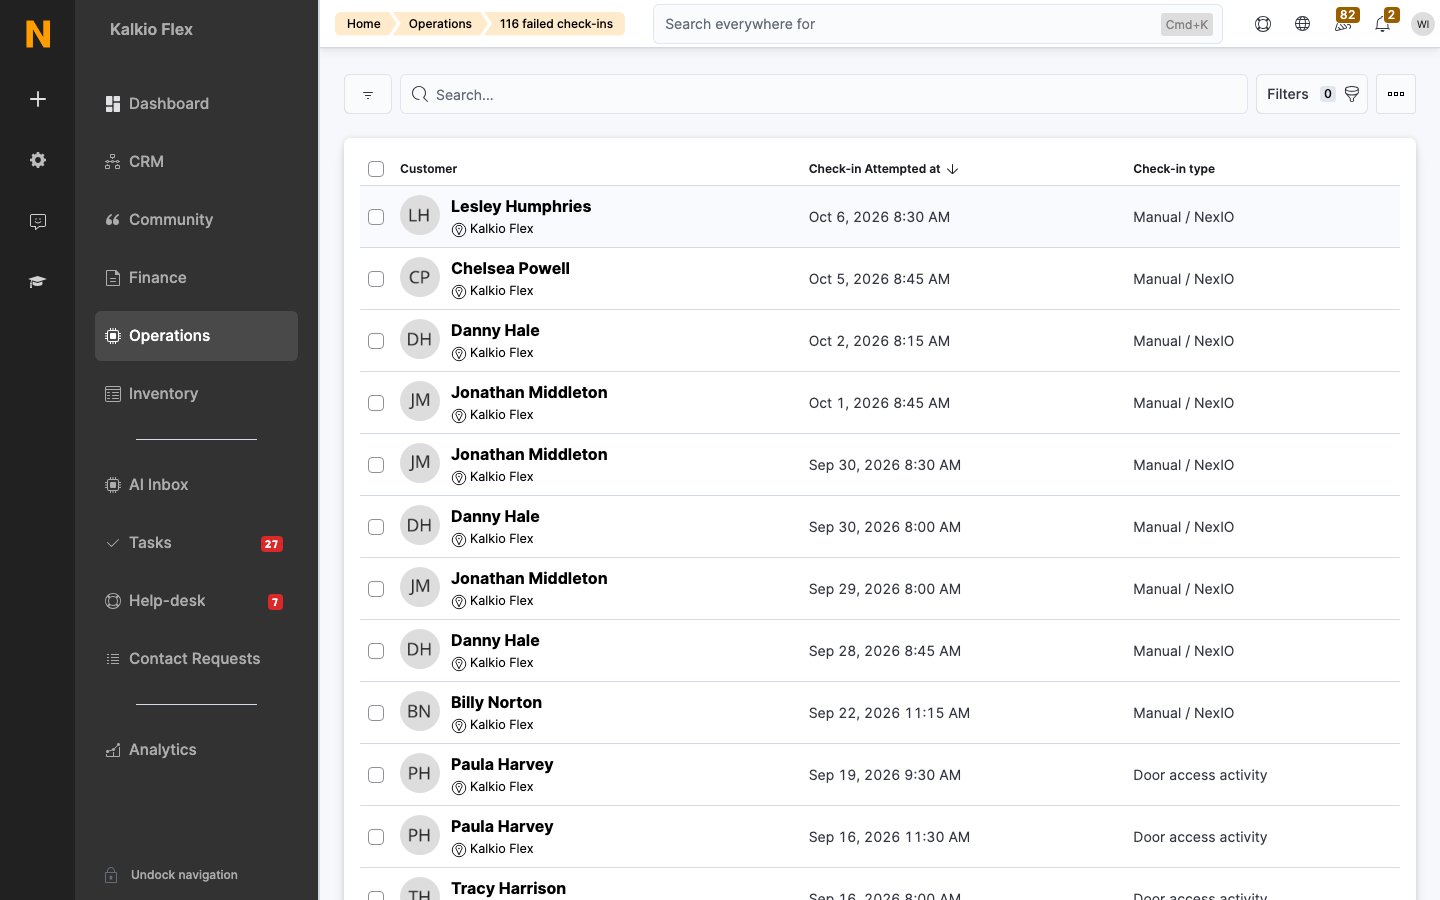
  • Failed check-ins: Navigate to Operations → Access & Check-in → Failed check-ins
Requires the checkin role.

Key concepts

TermMeaning
Check-inA record that a customer arrived at your location, with start and optional end time
Check-outClosing a check-in by recording the departure time
PassA customer’s entitlement to access the space (from a plan benefit or a standalone pass purchase)
Pay-as-you-goA mode where customers without a plan are charged per-minute for their time on-site
Daily cut-off timeThe hour at which all customers are automatically checked out (e.g., midnight or 2 AM)
Failed check-inA check-in attempt that was rejected because the customer didn’t meet the requirements
Check-in sourceHow the check-in was triggered (manual, door access, WiFi, etc.)

Check-in sources

Check-ins can be created through several methods:
SourceHow it works
Manual / NexIOAn administrator checks the customer in from the dashboard, or the customer uses the NexIO front-desk app
Door accessA door access integration (Kisi, Salto, Gallagher, etc.) detects the customer entering the building
Network activity (WiFi)The system detects the customer’s device MAC address on the WiFi network
Automation tileA configured automation tile triggers a check-in (e.g., tapping an NFC tag)
SensorAn IoT sensor detects the customer’s presence
BookingA booking starts and the customer is automatically checked in for the duration

The check-in calendar

The main check-ins page displays a hybrid calendar and list view showing:
  • Who is currently on-site (open check-ins with no departure time)
  • Recent check-ins and check-outs
  • Booking-based check-ins (displayed separately)
  • Visitor check-ins from bookings

Calendar views

  • Month view — Overview of check-in activity across the month
  • Timeline view — Check-ins grouped by customer, showing durations as bars
  • List view — Tabular list of check-ins by day

Check-in list columns

ColumnDescription
CustomerThe customer’s full name (links to their profile)
Start timeWhen the customer checked in
End timeWhen the customer checked out (blank if still on-site)
PlanThe customer’s active plan at the time of check-in
TeamThe customer’s team membership at the time of check-in

Creating a manual check-in

1

Open the check-in calendar

Navigate to Operations → Access & Check-in → Customers on site.
2

Click on a time slot or use the new button

Select a date/time on the calendar or click the ”+” button to open the check-in form.
3

Select the location

Choose the location where the customer is checking in.
4

Select the customer

Choose the customer from the dropdown.
5

Set arrival and departure times

Set the arrival time. You can optionally set a departure time (or leave it open to check the customer out later). Use the duration shortcuts (1h, 2h, 4h, 8h) for quick selections.
6

Save

Click Save. The system validates that the customer has a valid pass and records the check-in.
Times are rounded to the nearest 15-minute interval automatically.

Check-in form fields

FieldDescription
LocationThe location where the customer is checking in
CustomerThe customer being checked in
Check-in typeThe source of the check-in (read-only after creation — see “Check-in sources” above)
ArrivalThe check-in start time
DepartureThe check-out time (leave empty for an open check-in)

How pass validation works

When a customer checks in, the system validates their entitlement in this order:
  1. Is the account active? — Disabled accounts cannot check in.
  2. Does the customer have a valid pass? — The system looks for an unused pass that:
    • Is valid at the current time (within the pass’s allowed hours and days)
    • Is valid at this location (if the pass is restricted to specific locations)
    • Has remaining time (if the pass is time-based)
    • Is not already in use by another check-in (for single-use passes)
  3. Are plan limits exceeded? — For members with a plan, the system checks:
    • Weekly check-in limit (max number of check-ins per week)
    • Weekly hours limit (max hours per week)
    • Monthly check-in limit (max number of check-ins per month)
    • Monthly hours limit (max hours per month)
    • Plan-period check-in limit (total check-ins since last renewal)
    • Plan-period hours limit (total hours since last renewal)
  4. Is pay-as-you-go available? — If no pass is found, the system checks if pay-as-you-go access is enabled and a valid pay-as-you-go pass exists.
If all checks fail, the check-in is rejected and recorded as a failed check-in.

Pass priority

When multiple valid passes exist, the system selects one based on:
  1. Passes with the highest priority value (configured on the pass)
  2. Passes restricted to this location (more specific = preferred)
  3. Passes linked to specific plans
  4. Passes with the most remaining time
  5. Plan-included passes over standalone passes

Shared passes (teams)

If the customer doesn’t have their own valid pass, the system checks if their team’s paying member has shared passes available. Shared passes are used when:
  • The team has pass-sharing enabled
  • The paying member has valid passes with remaining time

Failed check-ins

When a check-in attempt fails, a record is created in Operations → Access & Check-in → Failed check-ins with:
FieldDescription
CustomerWho attempted to check in
Check-in attempted atWhen the attempt was made
Check-in typeThe source (manual, door access, WiFi, etc.)
DescriptionThe reason the check-in failed

Common failure reasons

ReasonMeaning
Account disabledThe customer’s account is inactive
No valid passThe customer has no pass that’s valid at this time and location
Plan limits exceededThe customer has used all their included check-ins or hours for the current period
Pass not valid at this locationThe customer has a pass, but it’s restricted to a different location
Pass expiredThe customer’s pass has expired

Filter segments

Failed check-ins can be filtered by:
  • Today
  • This week
  • Last week
  • This month
  • Last month
Review failed check-ins regularly to identify customers who may need a plan upgrade or have an expired pass.

Automatic check-out

The system automatically checks customers out in several scenarios:

Daily cut-off time

All customers are automatically checked out at the configured daily cut-off time (e.g., midnight or 2 AM). This prevents check-ins from spanning into the next day when customers forget to check out. The cut-off time is configured in hours (0–23) and represents the time in your location’s timezone.

Pass depletion

If a customer’s pass runs out of remaining time while they’re checked in, the system:
  1. Checks every 5 minutes whether the check-in is still valid
  2. If the pass is depleted, automatically checks the customer out at the time the pass ran out
  3. Attempts to check the customer back in with a new pass (if one is available)
  4. If no new pass is available, sends an auto-checkout notification (if enabled)

Pass time restrictions

If a pass is only valid during certain hours (e.g., “Weekdays 9 AM – 6 PM”), the system automatically checks the customer out when the valid window ends.

Day change

If a check-in spans across the daily cut-off time (e.g., customer checked in at 10 PM, cut-off is midnight), the customer is checked out at the cut-off time. If they’re still on-site after the cut-off, a new check-in is started for the new day.

Pay-as-you-go access

Pay-as-you-go mode lets customers who don’t have a plan (or who have exceeded their plan limits) still check in and be charged per-minute for their time.

How it works

  1. When a customer checks in with no valid pass, the system looks for a pay-as-you-go pass configured for their customer type (member or contact).
  2. A temporary pass is created with zero minutes.
  3. When the customer checks out, the total time is calculated and a charge is generated based on the pass’s per-minute rate.
  4. The charge appears on the customer’s next invoice (or immediately for contacts, depending on settings).

Pay-as-you-go settings

SettingEffect
Enable pay-as-you-go accessAllows customers without a valid pass to check in and be charged per minute
Exclude time used in bookingsDeducts time spent in bookings from the pay-as-you-go calculation (avoids double-charging)
Members pay via their contractPay-as-you-go charges for members are added to their contract invoice instead of generating a separate invoice
Minimum daily priceThe minimum charge for a day, regardless of how little time was used
Maximum daily priceThe maximum charge for a day, regardless of how much time was used (acts as a daily cap)

Check-in settings

Check-in settings are found under Settings → Members → Check-in settings.

General settings

SettingEffect
Notify customers when running low on access timeSends an email when the customer’s remaining pass hours drop below the threshold
Low credit threshold (hours)The number of hours below which the low-credit notification is sent
Notify customers if they forget to check outSends an email when the system auto-checks out a customer
Record multiple check-ins per dayWhen enabled, checking in and out multiple times in one day creates separate records. When disabled, re-checking in on the same day re-opens the previous check-in.
Daily cut-off timeThe hour (0–23) at which all customers are automatically checked out
Building capacityMaximum number of people allowed on-site simultaneously (enforced by NexIO)

Network check-in settings

SettingEffect
Automatically check known users in based on their MAC addressWhen the system detects a registered device on WiFi, automatically creates a check-in
Generate an access token for every pre-registered visitorCreates a WiFi access token for visitors automatically
Default duration for visitor access tokensHow long visitor WiFi tokens remain valid (in minutes)
Maximum devices per userLimit on how many devices a single customer can register for network check-in
Maximum devices per visitorLimit on how many devices a visitor can connect

Webhooks

The following webhook events are triggered by check-in activity:
EventTriggered when
Customer checked inA check-in is successfully created
Customer checked outA check-in is closed (departure time set)
Customer check-in failedA check-in attempt is rejected
Check-in createdA check-in record is created (includes manual/admin)
Check-in updatedA check-in record is modified
Check-in deletedA check-in record is removed

Best practices

  • Set a daily cut-off time to prevent check-ins from spanning days when customers forget to check out. A time between midnight and 4 AM works well for most spaces.
  • Enable auto-checkout notifications so customers know when they’ve been checked out and can see their usage for the day.
  • Use pay-as-you-go with a daily cap to offer flexible drop-in access while capping the cost at a reasonable day rate.
  • Review failed check-ins weekly to identify customers hitting plan limits — these are upgrade opportunities.
  • Enable network check-in for a frictionless experience — customers are checked in automatically when their phone connects to WiFi.
  • Set building capacity if your location has occupancy limits — NexIO will prevent check-ins when the space is full.

Passes

Configure the passes that determine who can check in.

Plans

Set up plan benefits including check-in limits and included passes.

Access control

Integrate with door systems for automated check-ins.

Bookings

Bookings can automatically check customers in for the duration of their reservation.