
Overview

A virtual office plan is a plan with extra settings for running a virtual office: what customers can have done with their mail and parcels, what you charge for it, how many recipients and addresses they can add, and the checks they go through when they sign up. These settings are on the plan’s Virtual Office tab. You need the Virtual Offices add-on.

Create a virtual office plan

  1. Go to Inventory → Plans and select Add plan.
  2. Choose Virtual office plan.
  3. Enter the Plan name and the monthly price, and the billing options.
  4. Open the new plan and set up its Virtual Office tab. See below.
To create one from scratch instead, add a plan as usual and, on Plan details, tick This plan is a virtual office plan before you sell it.

Turn an existing plan into a virtual office plan

You can’t tick This plan is a virtual office plan on a plan that has active contracts. Use More actions → Update to Virtual Office instead. This:
  • Moves all current contracts on the plan to virtual office contracts.
  • Creates a separate profile for customers with more than one contract.
  • Sets each contract’s owner as the virtual office applicant, under the contract’s Contacts → Beneficiaries.
Then choose when to ask existing customers to verify their identity: Keep identity checks disabled, Request identity checks now or Schedule identity checks for a date.

Delivery handling

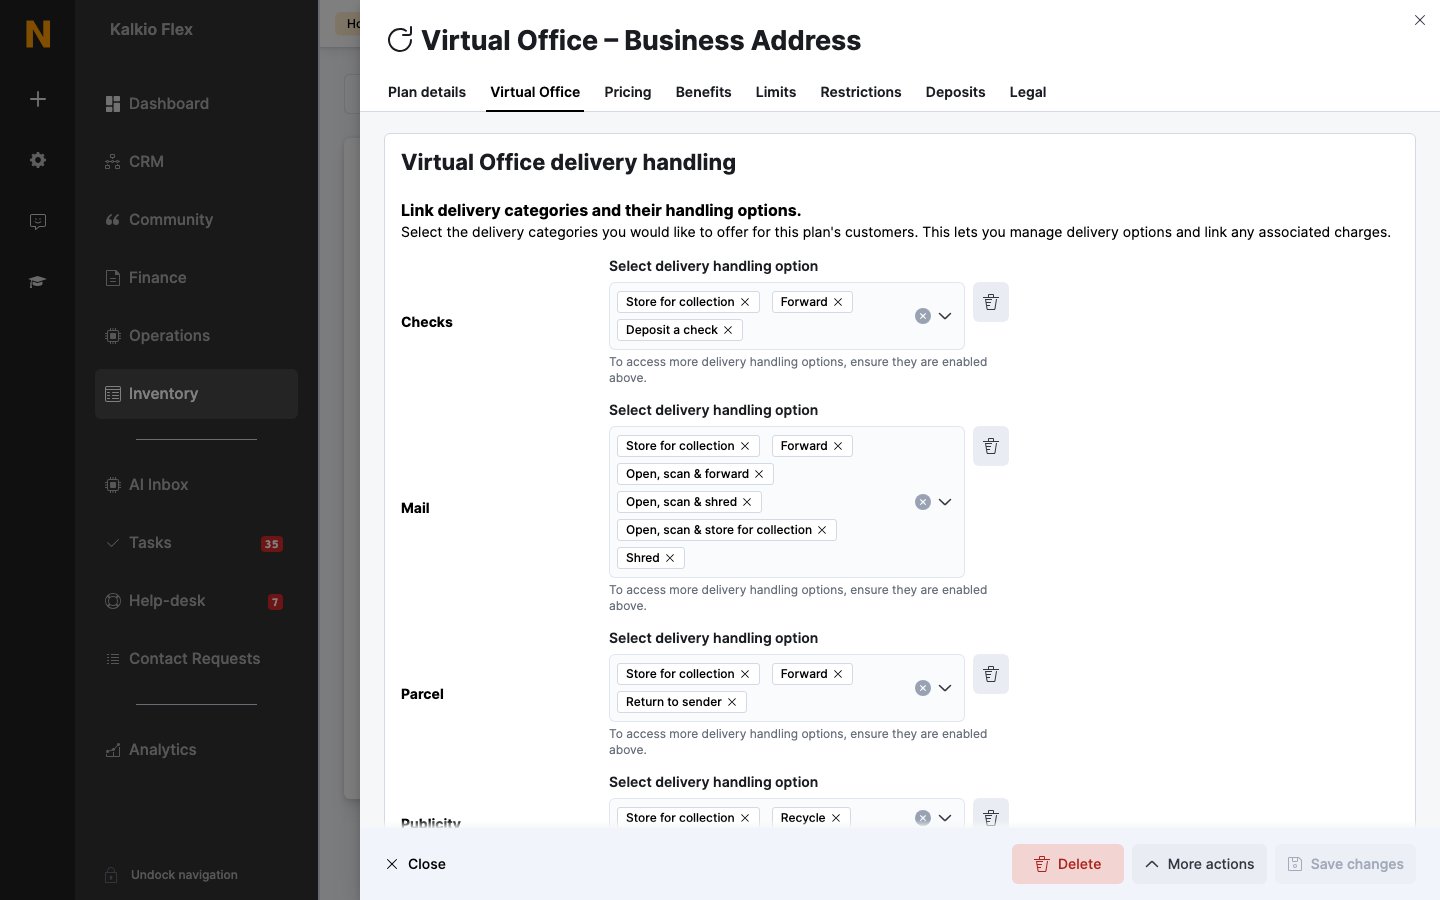
Under Virtual Office delivery handling, choose the delivery types the plan covers, and the handling options customers can choose for each. Select Add delivery type(s) to add Mail, Parcel, Checks or Publicity. Delivery handling options on a virtual office plan Customers choose one option for each delivery type during onboarding, and can change it later. You can also set it on their contract. See Handle virtual office deliveries.
Charges

Under Link charges to delivery handling options, choose the products to charge for each action: Store, Collect, Forward, Scan, Recycle, Shred, Return to sender and Deposit a check. Only the actions used by the options you’ve chosen are listed. Leave an action on No handling charge to do it for free. When your team completes that step on a delivery, they can add one of the linked products as a charge. See Charges. For Collect, set the Maximum number of free storage days. When a customer collects an item after that, Nexudus suggests charging the collection product once for each extra day it was stored.

Contacts limits

Limit how many Company aliases, Recipients and Forwarding Addresses customers on the plan can add after onboarding. Anything they add during onboarding doesn’t count towards the limits.

Onboarding

The Virtual office onboarding section sets the checks customers go through when they buy the plan: proof of address, proof of ID, AML screening, an onboarding form, and whether the contract waits for the checks. See Onboarding and compliance.